You're not the only one to wish you could make art but too scared to try! Many people are just as scared, but if you think about it...what's the worst that can happen? It could be a little messy...it could even be...fun! Here is an exhilaratingly easy project that will help restore your faith in your artistic abilities.
Be openminded! If something unexpected happens, go with it, you may discover your own unique approach. Please let me know if you take the plunge and how your attempt goes.
Materials needed:
Be openminded! If something unexpected happens, go with it, you may discover your own unique approach. Please let me know if you take the plunge and how your attempt goes.
Materials needed:
Any poster paint or acrylic, basic colours like red, yellow, green, blue black and white
take-away coffee cups (dollar store)
wooden stirrers (free from your friendly neighbourhood coffee shop)
3 to 5 black plastic caps from empty markers *
glue gun
a small canvas (mine was 20x20cm)
teaspoon or dropper
glass of water
toothpicks
four straws
two sheets of white A3 paper
newspaper
take-away coffee cups (dollar store)
wooden stirrers (free from your friendly neighbourhood coffee shop)
3 to 5 black plastic caps from empty markers *
glue gun
a small canvas (mine was 20x20cm)
teaspoon or dropper
glass of water
toothpicks
four straws
two sheets of white A3 paper
newspaper
Step 1
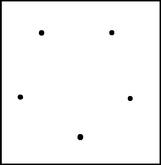
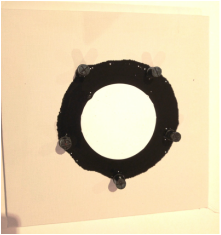
Carefully glue the caps onto the canvas in a roughly circular shape. You don't want thick blobs of glue sticking out the sides, this is the only part where you need to take a little care. This will just keeps the caps from falling over into the wet paint.
* if you don't have empty markers, short pieces of wooden dowel will also work, just paint it black in advance.
Step 2
Prepare your work surface. Cover with newspaper and a sheet of white paper, place canvas on top. Place the second piece of paper on a tray for later.
Step 3
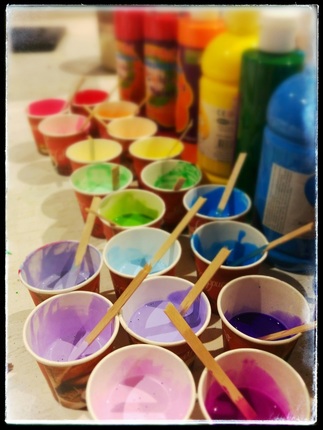
Now you can start mixing up a range of pretty colours: pour about about two tablespoons of each colour into a cup and combine colours in separate cups to mix more shades: red and yellow for orange, red and blue for purple, blue and yellow for green. Maybe you already have green, then you'll probably make a brand new green of your own, which is great! Then mix pastels in different cups by adding white, until you have about twelve colours and feel happy with your pallette. (You can make different purples by changing the red/blue/white ratio, and in the same way different oranges and greens)
Step 4
The paint needs to be thin enough to pour and flow, but not so watery and thin that the colours mix together freely, so we'll add a bit of water to each cup with a teaspoon or dropper and mix in well until it is a creamy consistency. This will depend a lot on the type of paint you're using, but don't fear! Really thick acrylics may need a little more water and if you're lucky enough to have flow acrylics you may not need any water at all. The ratio for poster paint is roughly 3:1 paint to water. Remember to mix up some black too!
Prepare your work surface. Cover with newspaper and a sheet of white paper, place canvas on top. Place the second piece of paper on a tray for later.
Step 3
Now you can start mixing up a range of pretty colours: pour about about two tablespoons of each colour into a cup and combine colours in separate cups to mix more shades: red and yellow for orange, red and blue for purple, blue and yellow for green. Maybe you already have green, then you'll probably make a brand new green of your own, which is great! Then mix pastels in different cups by adding white, until you have about twelve colours and feel happy with your pallette. (You can make different purples by changing the red/blue/white ratio, and in the same way different oranges and greens)
Step 4
The paint needs to be thin enough to pour and flow, but not so watery and thin that the colours mix together freely, so we'll add a bit of water to each cup with a teaspoon or dropper and mix in well until it is a creamy consistency. This will depend a lot on the type of paint you're using, but don't fear! Really thick acrylics may need a little more water and if you're lucky enough to have flow acrylics you may not need any water at all. The ratio for poster paint is roughly 3:1 paint to water. Remember to mix up some black too!
Step 5
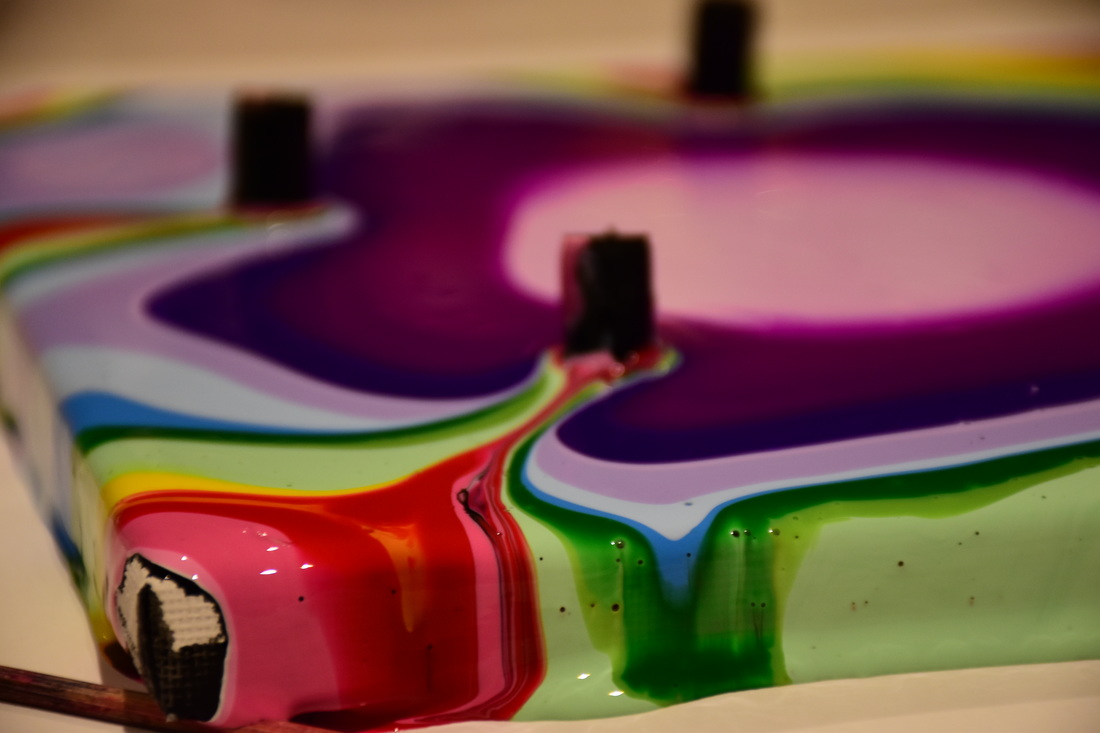
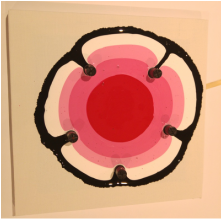
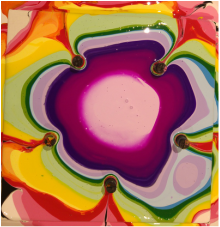
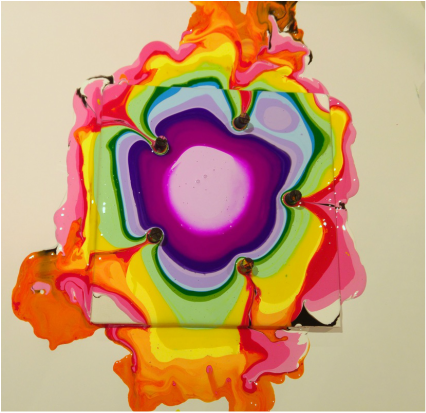
Now the fun begins. Starting with black, pour your colours in any order that you prefer into the centre of the canvas, allowing it to spread slowly. I liked pouring the colours in more-or-less rainbow order. Adding more paint in the centre will help move the previous layers away from the middle. When it starts flowing around the caps, the pattern starts changing and the magic really starts! Don't worry if the paint runs off the sides of the canvas, your white paper will catch it and become another artwork. If the paint runs to one side too much to your liking, you can prop up that side of the canvas a little by pushing a toothpick in between the paper and the canvas to level the surface. Keep adding paint until you are happy with the effect, and try to leave the corners of the canvas 'unpainted' for contrasting texture and to make it easier to move the canvas. But don't worry if the paint takes over. Remember, it will keep moving a bit after you stop pouring. Don't try to control it too much, let the flow do the work!
Now the fun begins. Starting with black, pour your colours in any order that you prefer into the centre of the canvas, allowing it to spread slowly. I liked pouring the colours in more-or-less rainbow order. Adding more paint in the centre will help move the previous layers away from the middle. When it starts flowing around the caps, the pattern starts changing and the magic really starts! Don't worry if the paint runs off the sides of the canvas, your white paper will catch it and become another artwork. If the paint runs to one side too much to your liking, you can prop up that side of the canvas a little by pushing a toothpick in between the paper and the canvas to level the surface. Keep adding paint until you are happy with the effect, and try to leave the corners of the canvas 'unpainted' for contrasting texture and to make it easier to move the canvas. But don't worry if the paint takes over. Remember, it will keep moving a bit after you stop pouring. Don't try to control it too much, let the flow do the work!
 |  |  |
Step 6
When you are done, place four straws on the second piece of paper on the tray to transfer the wet canvas to. Carefully take the canvas by the corners and keeping it level, move it onto the paper with the straws, each corner resting on a straw to let the canvas dry without the paint sticking to the paper. Leave undisturbed to dry. This can take up to a week depending on the paint and climate, but don't let this put you off! When dry, you'll have a beautiful artwork to your name, and two more papers with run-off paint patterns that you can cut up to make pretty rainbow-coloured cards.
PS. You don't have to remove the caps, they should have lodged quite well into the dried paint.

 RSS Feed
